Click here to leave comment on YouTube
If you want to test your blood to know what blood type you are, there’s an easy, simple, and affordable way to do it at home using the Eldon blood typing kit. I’m going to walk you through how to determine your blood type.
The ABO group system is the one we use to classify blood type as either A, B, AB or O. And the Rh group and more specifically the RhD group system is how we classify blood type as either positive or negative. For a review of that system, check out my last video.
Well, as great as it is to know the theory, how do you know what blood type YOU are?
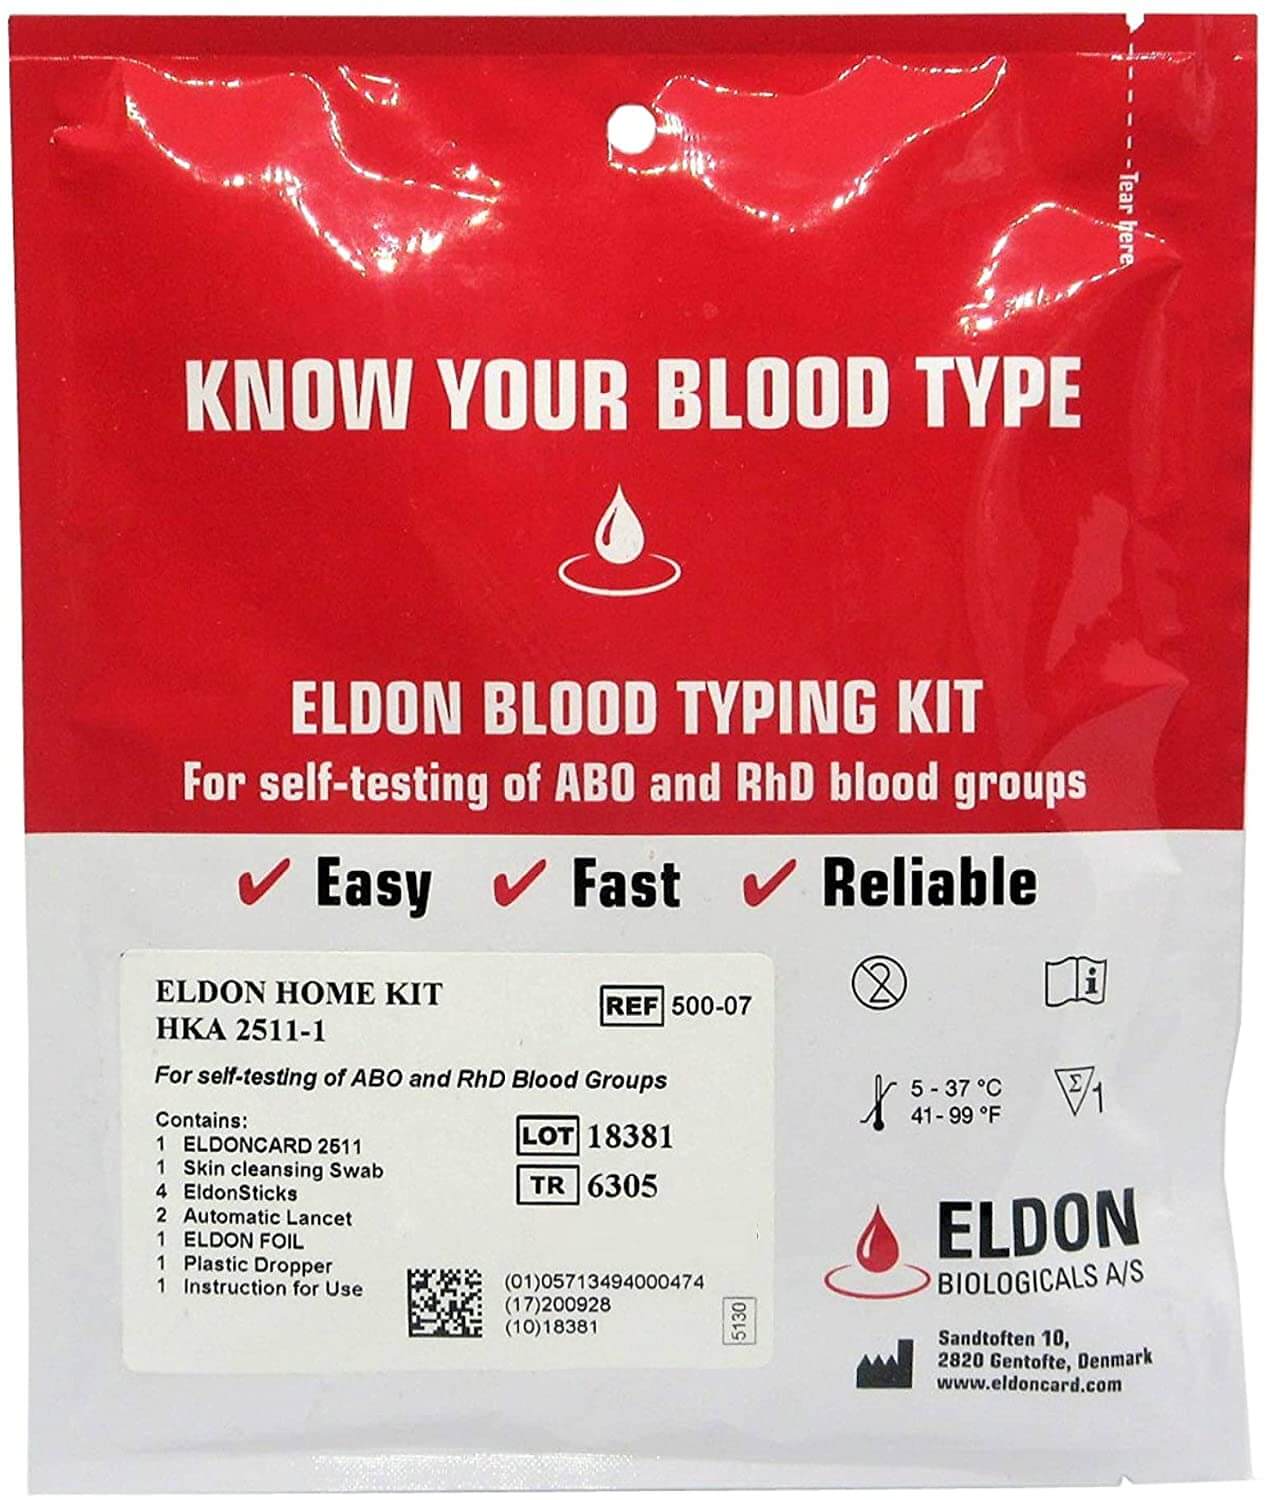
Fortunately, Eldon Biologicals A/S has created a very simple system for figuring it out. Now, you can get these testing kits on Amazon for under ten bucks. They have individual packs for $8.29 at the time of posting this article. In fact, I got a two-pack for $15.79.
I’m going to walk you through exactly how to use the kit here so that you don’t make any mistakes. It’s pretty straightforward, but there are a few things to pay attention to.
What’s Inside the Eldon Blood Type Test Kit?
Ok, we’re going to open the package and as you will see, there are a few things in the kit.
We have these EldonSticks – 4 to be exact. We also have this other packaging, this is where the actual Eldoncard is.
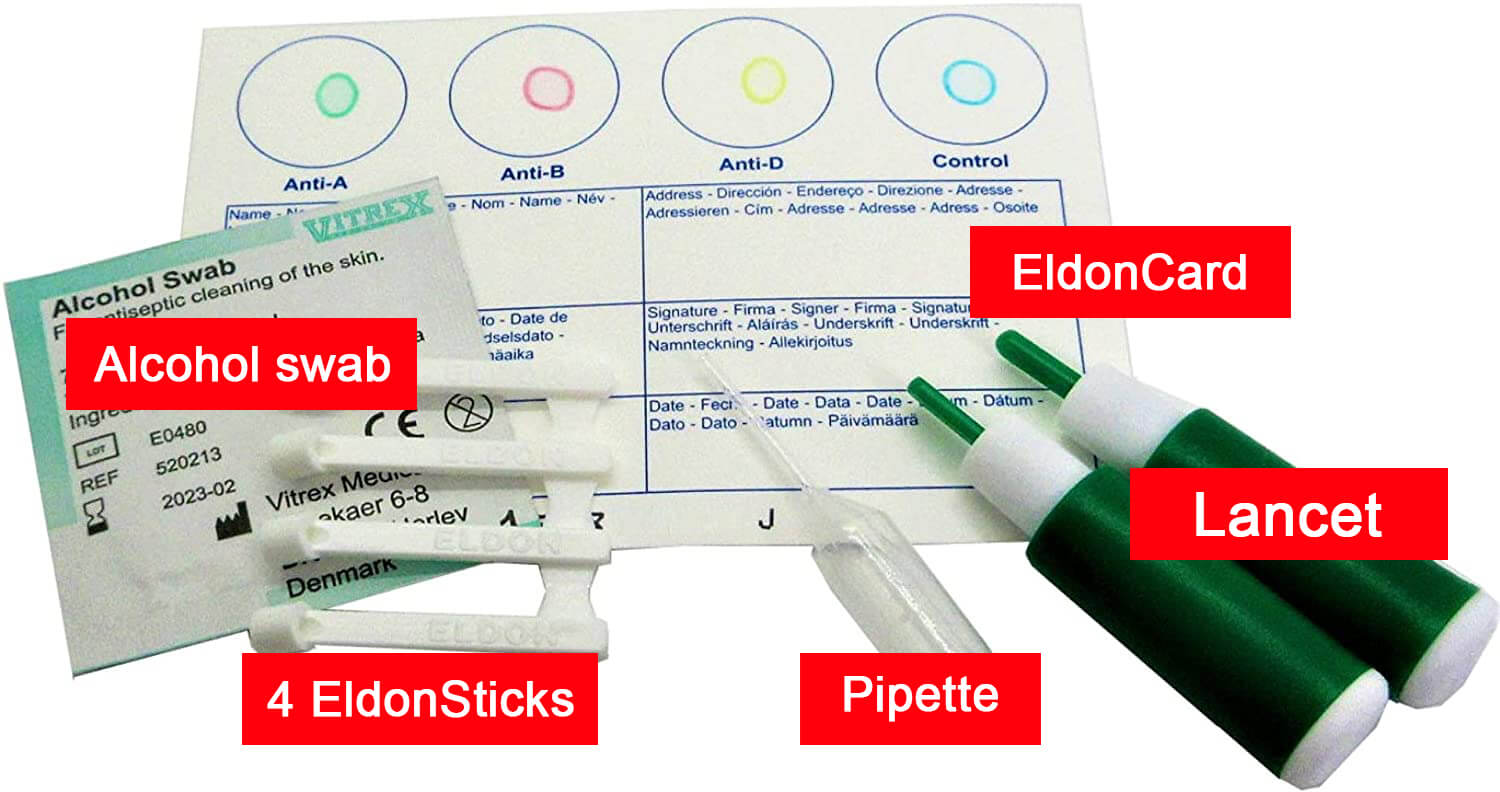
Next, we have the lancet. This is what we’ll be using to puncture our skin and get the blood. Don’t worry, it won’t hurt that much. It’ll be like a slight prick. No tears needed.
There’s an alcohol swab to sterilize your finger before puncturing your skin. And lastly, there’s a little plastic pipette. This is what you’ll be using for putting little drops of water on the card.
Now there are two additional things you’ll need that aren’t in the package. You’ll need a little bit of drinking water – not for you to drink though. You’ll see how we’ll use it in a sec. And lastly, you’ll need some a stopwatch, timer or clock. Technically, you don’t need this. There are some steps that you need to count 10 seconds. You can just count it in your mind.
I’ll use my iPad timer for this. Alright, let’s make this happen.
How to use the Eldon Blood Type Test Kit
Go ahead and open up the package with the Eldoncard. Be careful with this so that you don’t end up tearing the card, because that wouldn’t be cool.
The 4 Circles on the EldonCard
On the card, you’ll see there are four circles. On the first one, you have anti-A antibodies, the second one has anti-B antibodies. On the third circle are Anti-D antibodies– this is the one for determining if you are RhD positive or negative.
The last circle is the control. It basically contains all the same stuff that’s used for the others except that it doesn’t have any actual antibodies.

The idea here is that if you see agglutination in any of these, that tells you that the antigens for these antibodies are present.
So, if you see agglutination in the Anti-A circle, that person has Type A blood. If you see it in the Anti-B circle, you know he has type B blood. If you see it in both of these circles, anti-A and anti-B, then that person has type AB blood. If you don’t see it in either, there are no A or B antibodies, so that person has type O blood.
Once again, for a more in-depth explanation, check out the last video post.
Now, if you see agglutination in Anti-D, then that person is Rh-positive. And lastly, you shouldn’t see ANY agglutination in the Control circle. If you see agglutination, something went wrong with the test and your results are basically crap. Get another test and start over.
Doing the Bood Type Test with the Kit
Preparation.
- Separate these EldonSticks and place one by each of the circles. We don’t want any cross-contamination.
- Pipette one drop of water directly on the colored spots.
- Take out the alcohol swab and sterilize your finger by wiping it a few times and then letting it dry. Now, it’s time to do some damage.
- Twist the cap on the lancet and then pull it straight out. This is the part you want to be careful with. If you accidentally activate the lancet, that’s it. You can only use it once. I made this mistake once. Don’t be like me.
- Prick.
My finger was kind of cold when I did this which is bad for blood flow. I did this before with cold hands and had to do a lot of squeezing to get blood. I had to rinse my hand in warm water before doing the test.
Some other things you can do to maximize blood flow are: drink some water an hour before you do the test, warm your body up by doing some exercise, or take a hot bath to get things moving.
Extracting Blood and Adding it to the EldonCard
We’re ready to do the test now.
- Massage your finger towards the tip to increase the blood flow.
- Use one EldonStick for each circle. Get a drop of blood and place them in the circle.
- Stir each circle with the EldonStick for 10 seconds to spread out the mixture of blood, water and antibody inside the circle. Start your timer and then, start mixing.
The important thing here is to try to spread it out but avoid cross-contamination.
You’ll want to tilt the card at four different angles – about 45 degrees, for 10 seconds at each angle. Then try to get it so they are evenly spread out.

Reading the Results from the EldonCard
For my blood, I don’t have any agglutination in the anti-A or anti-B circles, which means that I’m type O. But there is agglutination in anti-D. So I’m actually type O positive.
And that’s it. I’m done. I can now put this down to air dry. You want to basically leave it until it’s completely dry and then you can laminate it using the enclosed protective stick sheet. Peel off the back and stick it to the card.
Recommendation Before Doing the Test
One more thing. They recommend you fill out your details like Name, Address, Date of birth, Signature, and Date before doing the test.
That way, once you have your results, you can write them here without having to disturb the card too much and then you can add the protective sheet when it’s all said and done.
So there you have it. It’s such an easy process that anyone can do it at home.
Links:
The links are affiliate links, so if you do purchase using the links, we do make a few cents and we can use those cents to take over the world, lol. But seriously – it’s just a simple way to support the Interactive Biology YouTube channel and doesn’t cost you any extra.
- Eldoncard Blood Type Test (Complete Kit) – 1 pack
- Eldoncard Blood Type Test (Complete Kits) – 2 packs
That’s it, until the next one.
Infographic
